WellBase provides access to a relational database management system for geological well data, including formation tops, deviation surveys, completions, perforations, and other types of mechanical data. When working on a project with multiple users, data protection is crucial to prevent issues during interpretation caused by accidental modifications to well data. The protect/unprotect tool in WellBase helps interpreters secure specific well data within a project and even create filters based on this protected data. This blog will explain, step by step, how to protect/unprotect selected well fields and create a filter using WellBase.
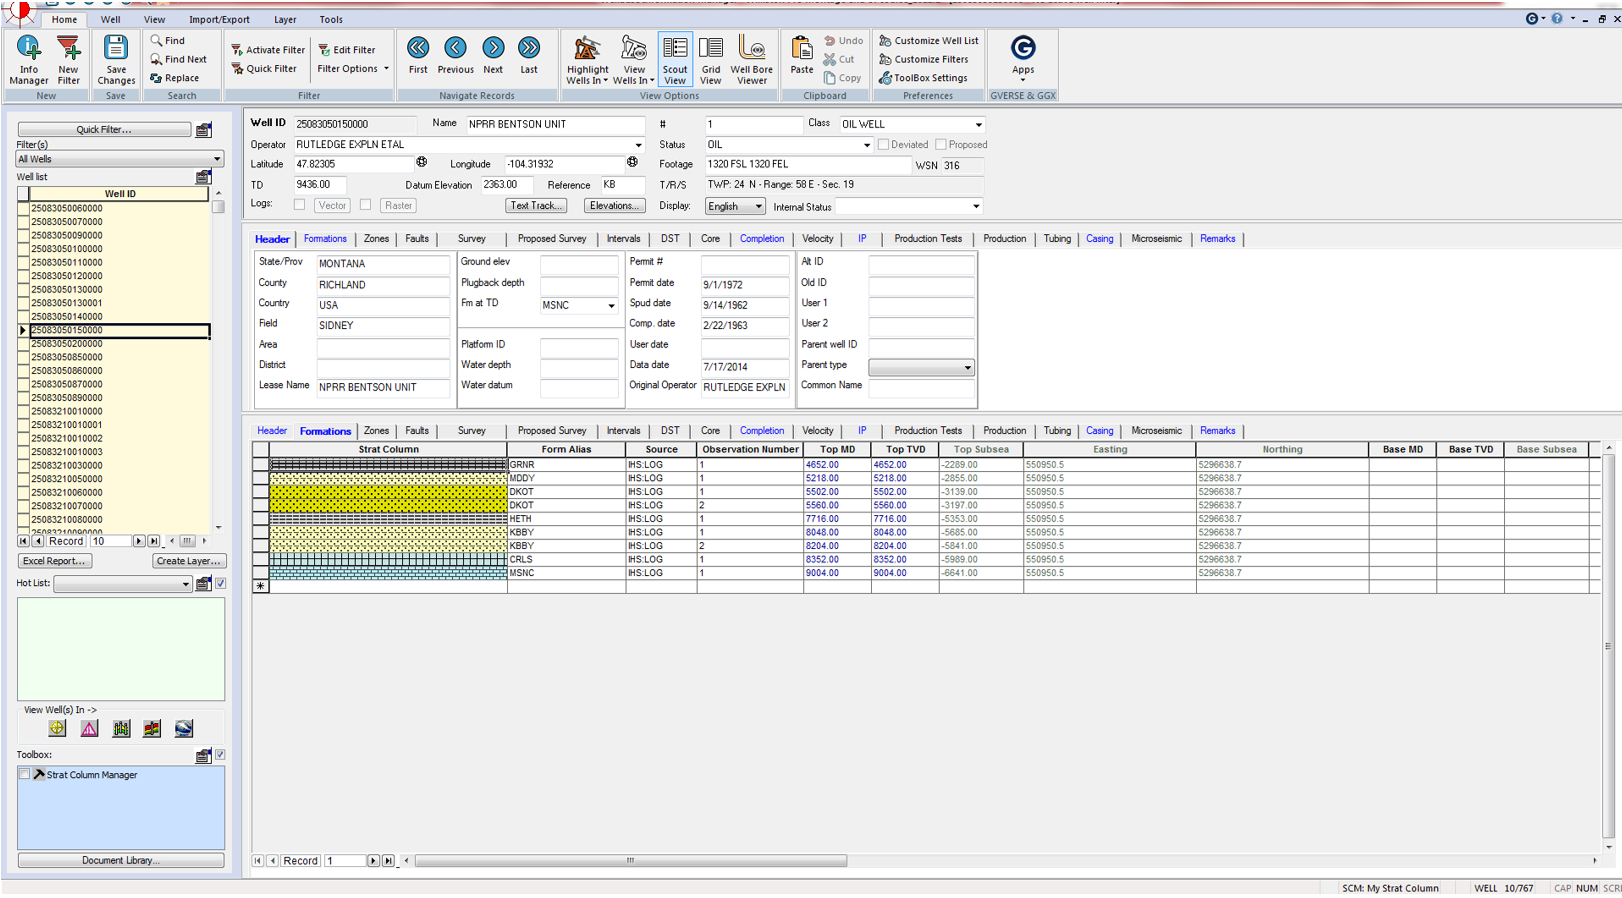
- Activate a project in GeoGraphix and click on the WellBase icon in the modules toolbar.


- WellBase will open.
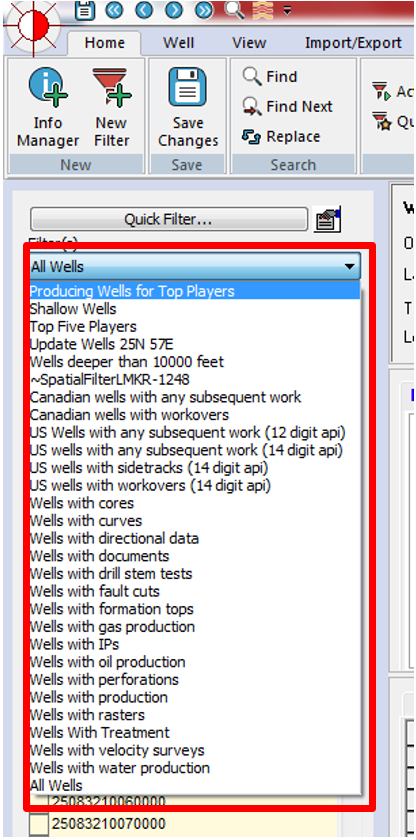
- If needed, activate a filter in the project. Go to filters and select a filter from the All Wells dropdown menu.
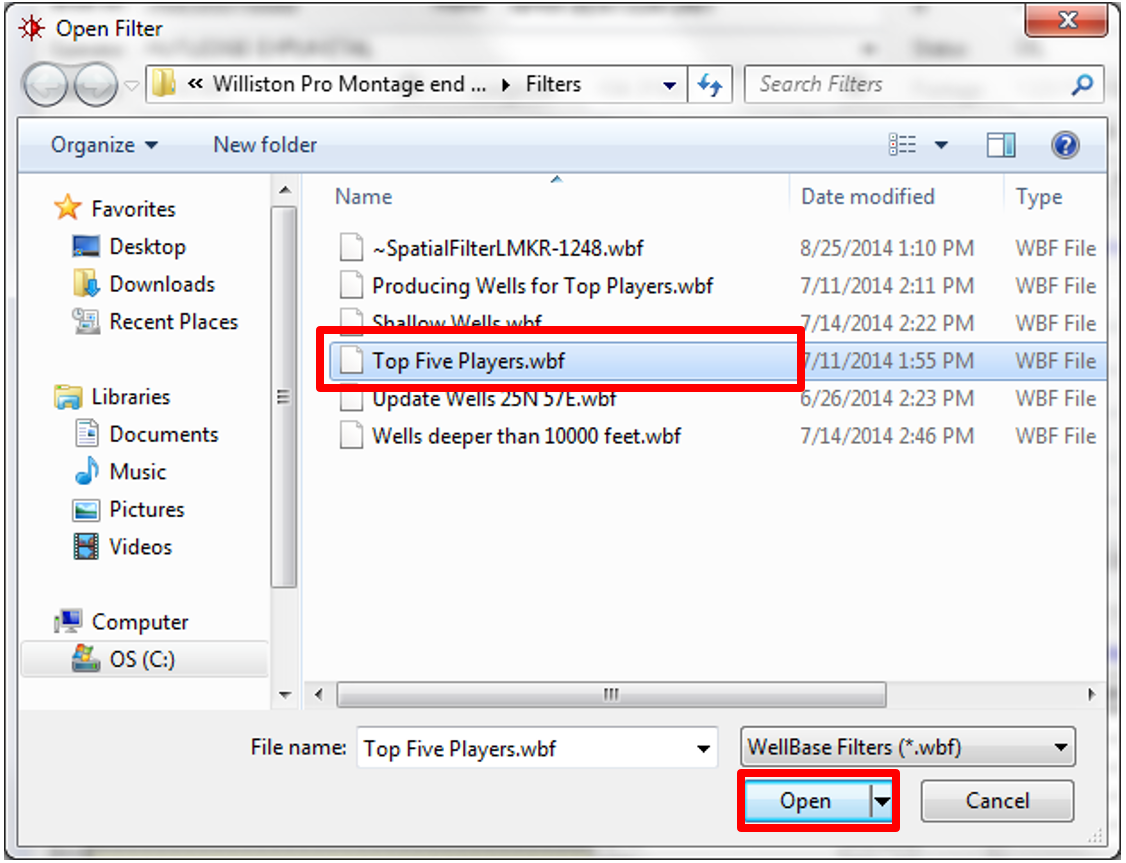
- Alternatively, you can activate a filter created in QueryBuilder. Go to Home and click Activate Filter.

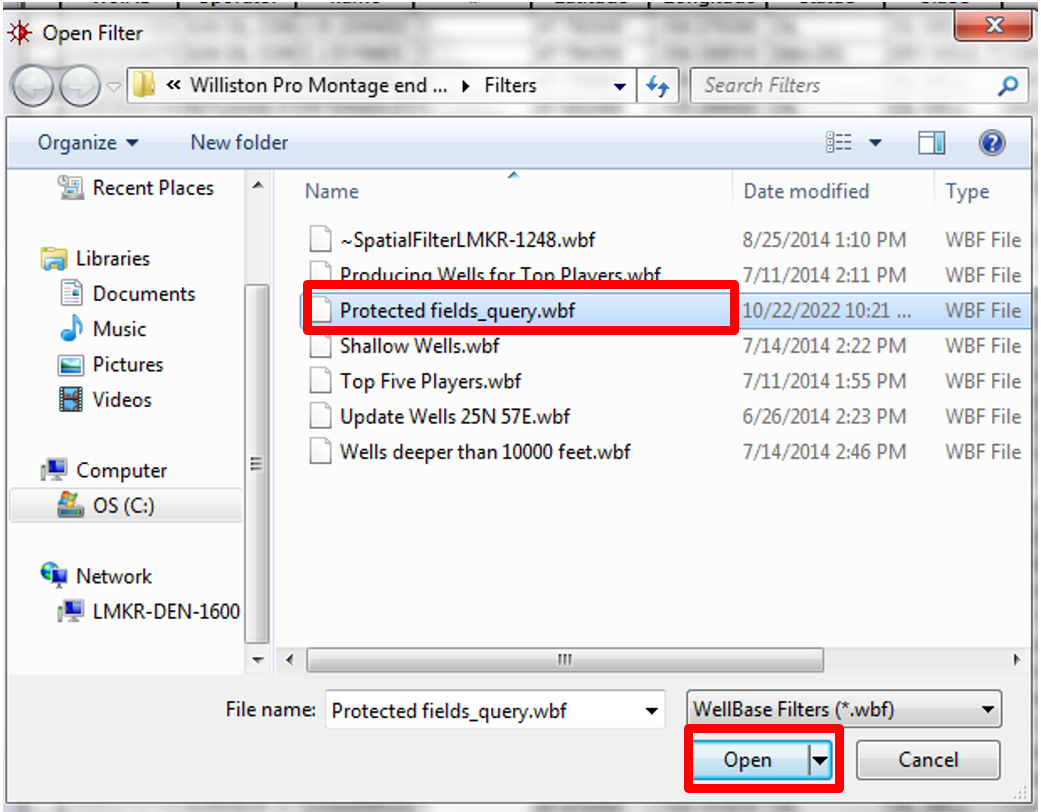
- The Open Filter window will appear. Select the filter from the list and click Open to activate it.
- You can choose not to activate any filter to protect/unprotect well fields.
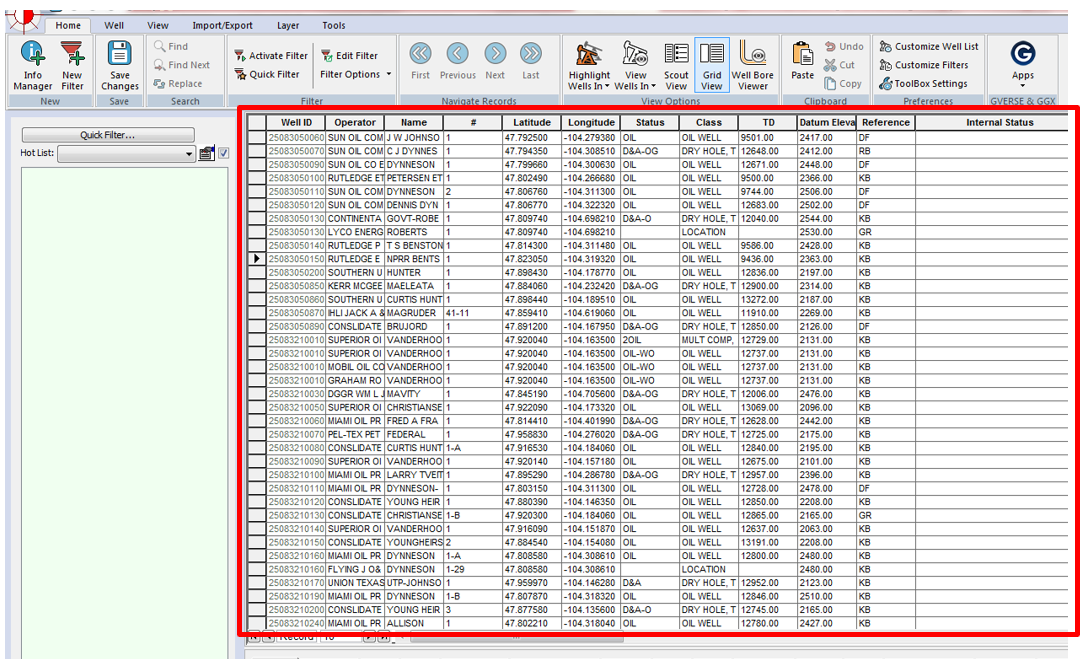
- In WellBase, go to the Home tab and click on Grid View. The Grid View will be displayed, showing all wells in the project in a spreadsheet format.

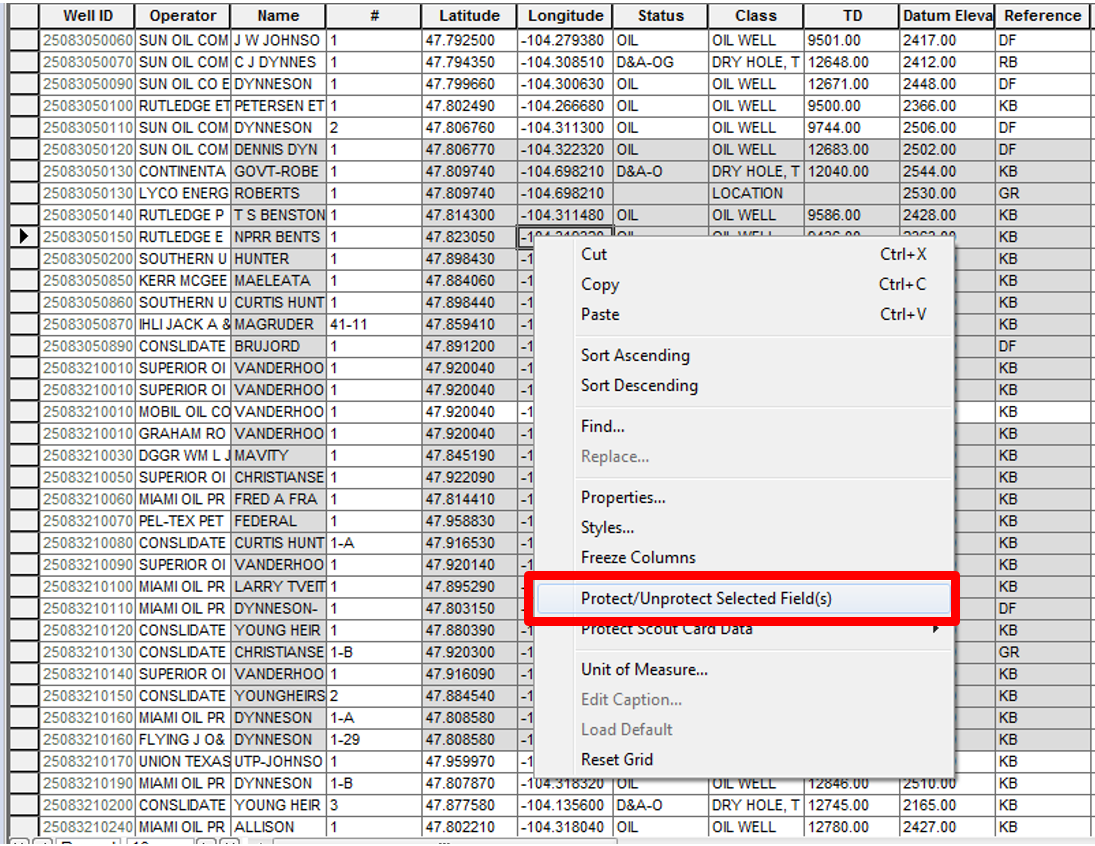
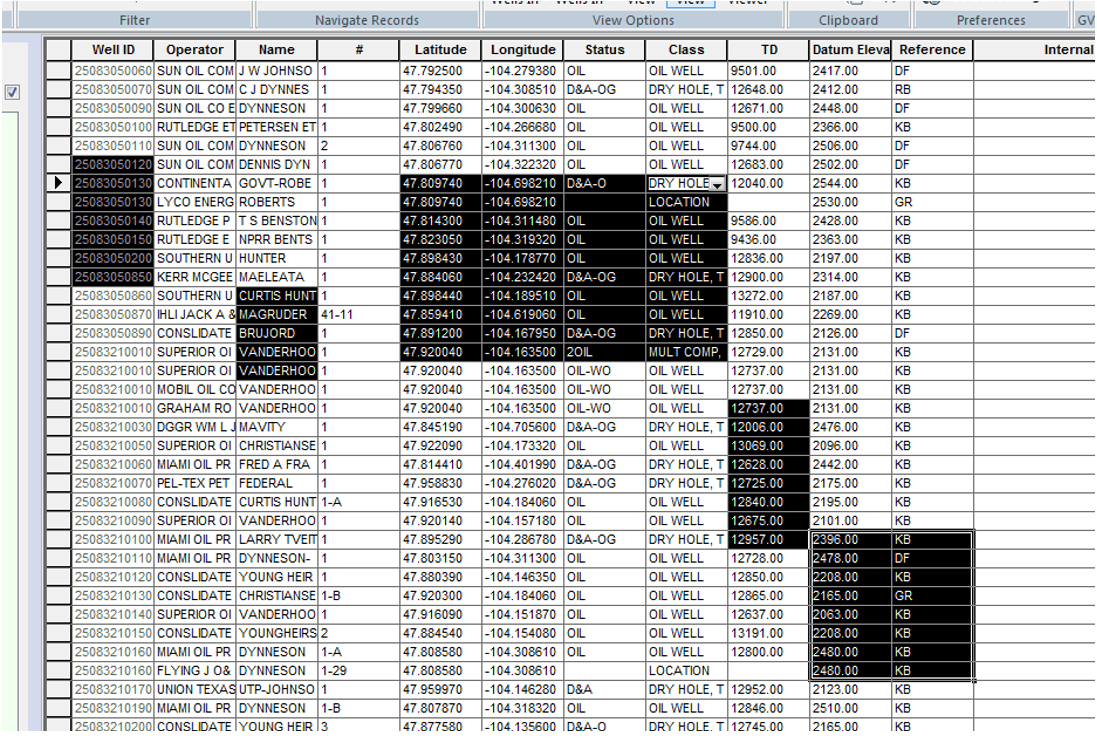
- While holding the left mouse button, select the data to be protected. The selected data will turn black (the data can be from different columns and rows).
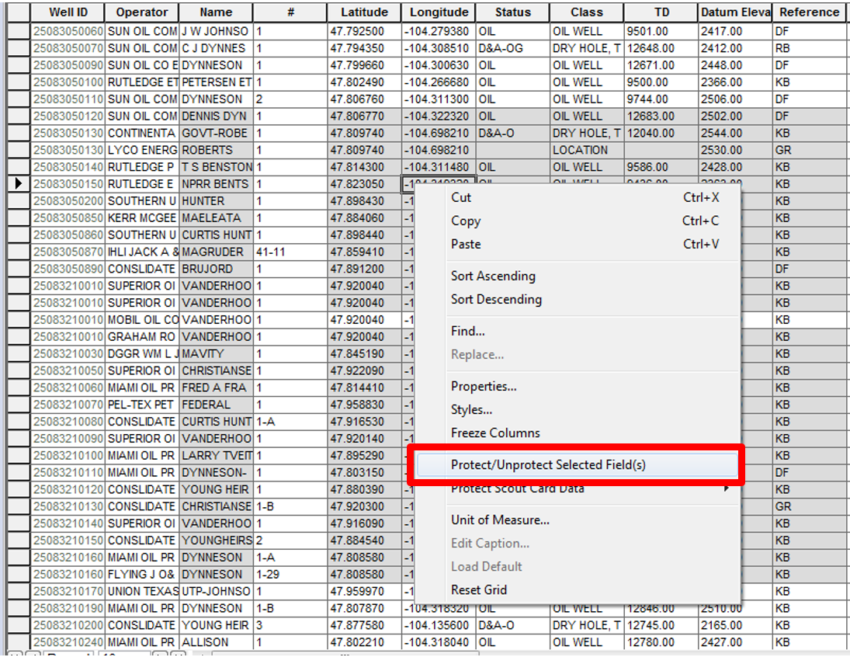
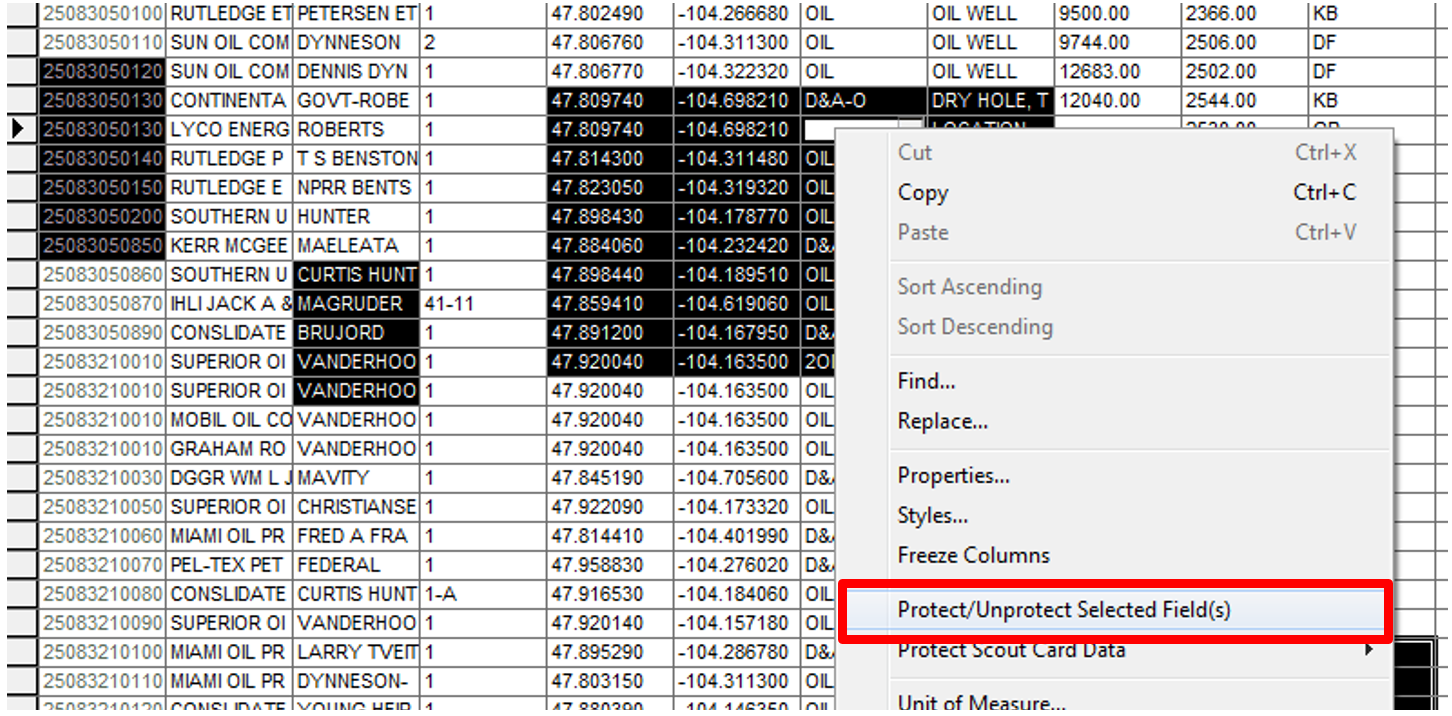
- After selecting the data, right-click and choose Protect/Unprotect Selected Field(s).
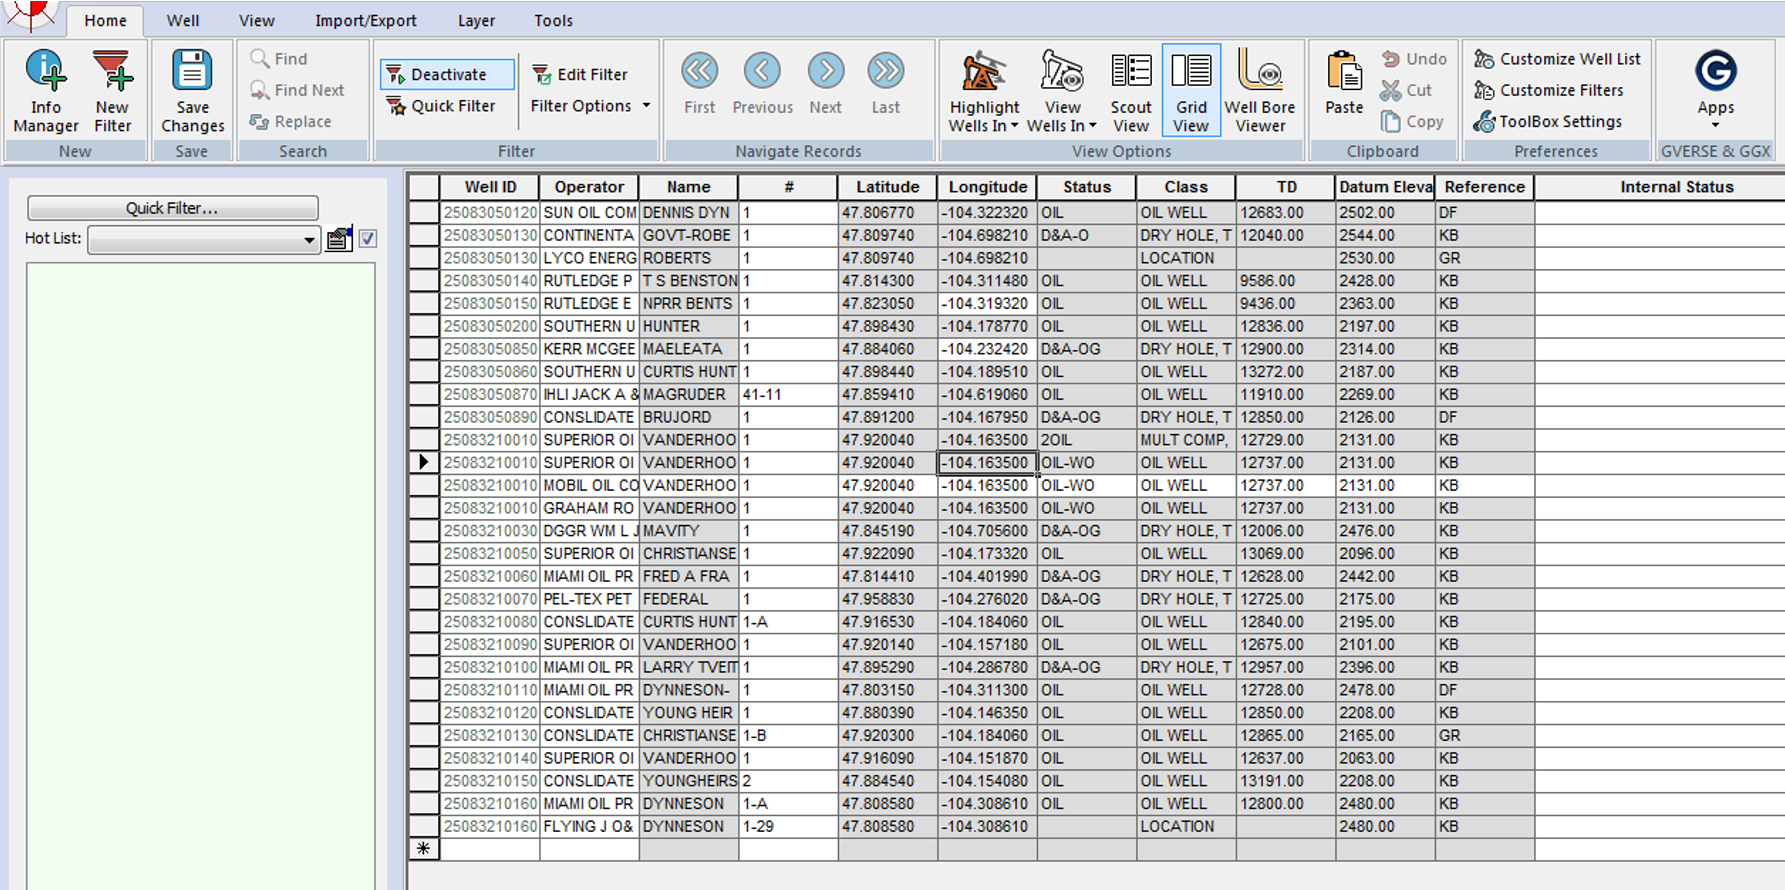
- The protected data will turn grey.
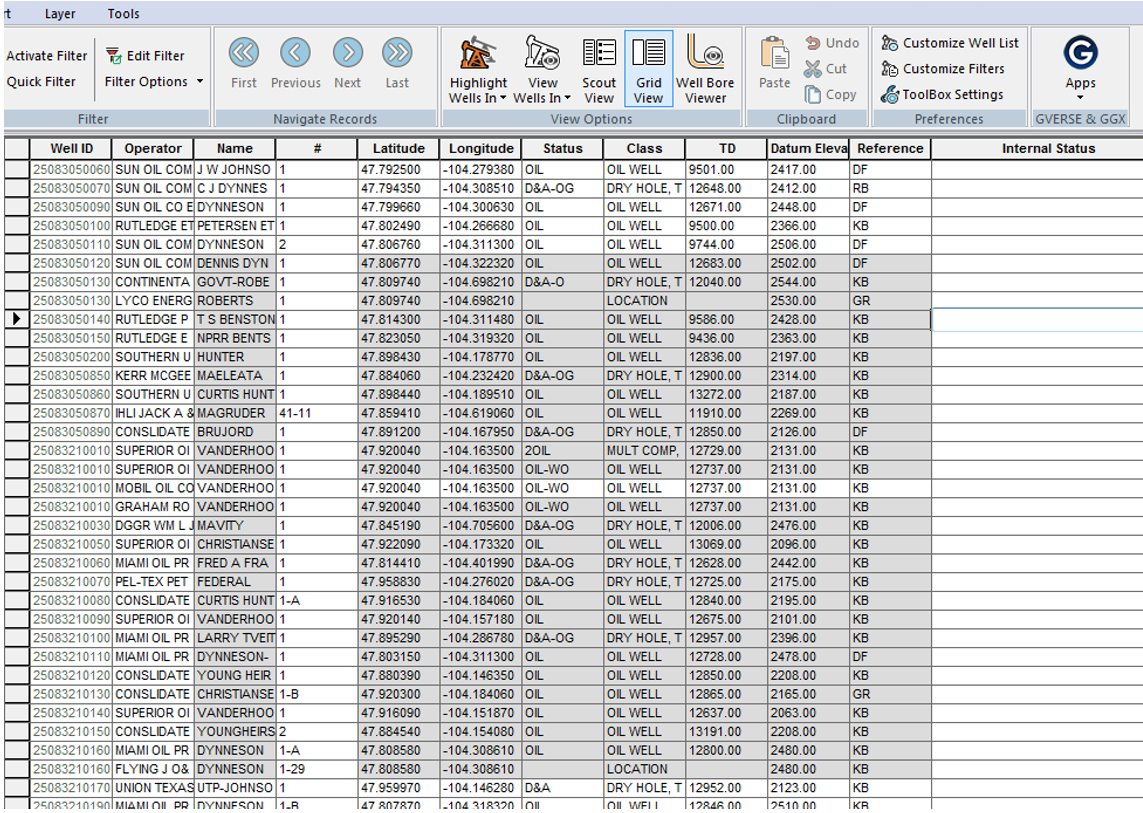
- To create a filter using the protected data, open QueryBuilder by clicking the QueryBuilder icon in the toolbar.

- QueryBuilder will open.

- In QueryBuilder, drag and drop item(s) from the tree to the grid. Expand the Protected Fields tree.
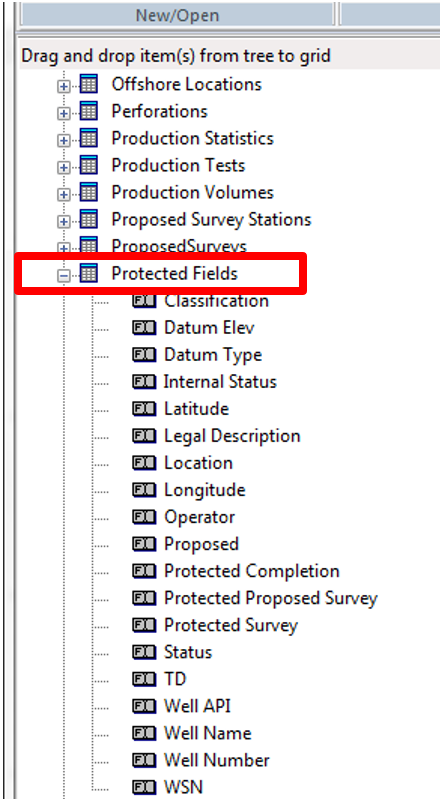
- Select and drag the data from the Protected Fields tree to the display data box.
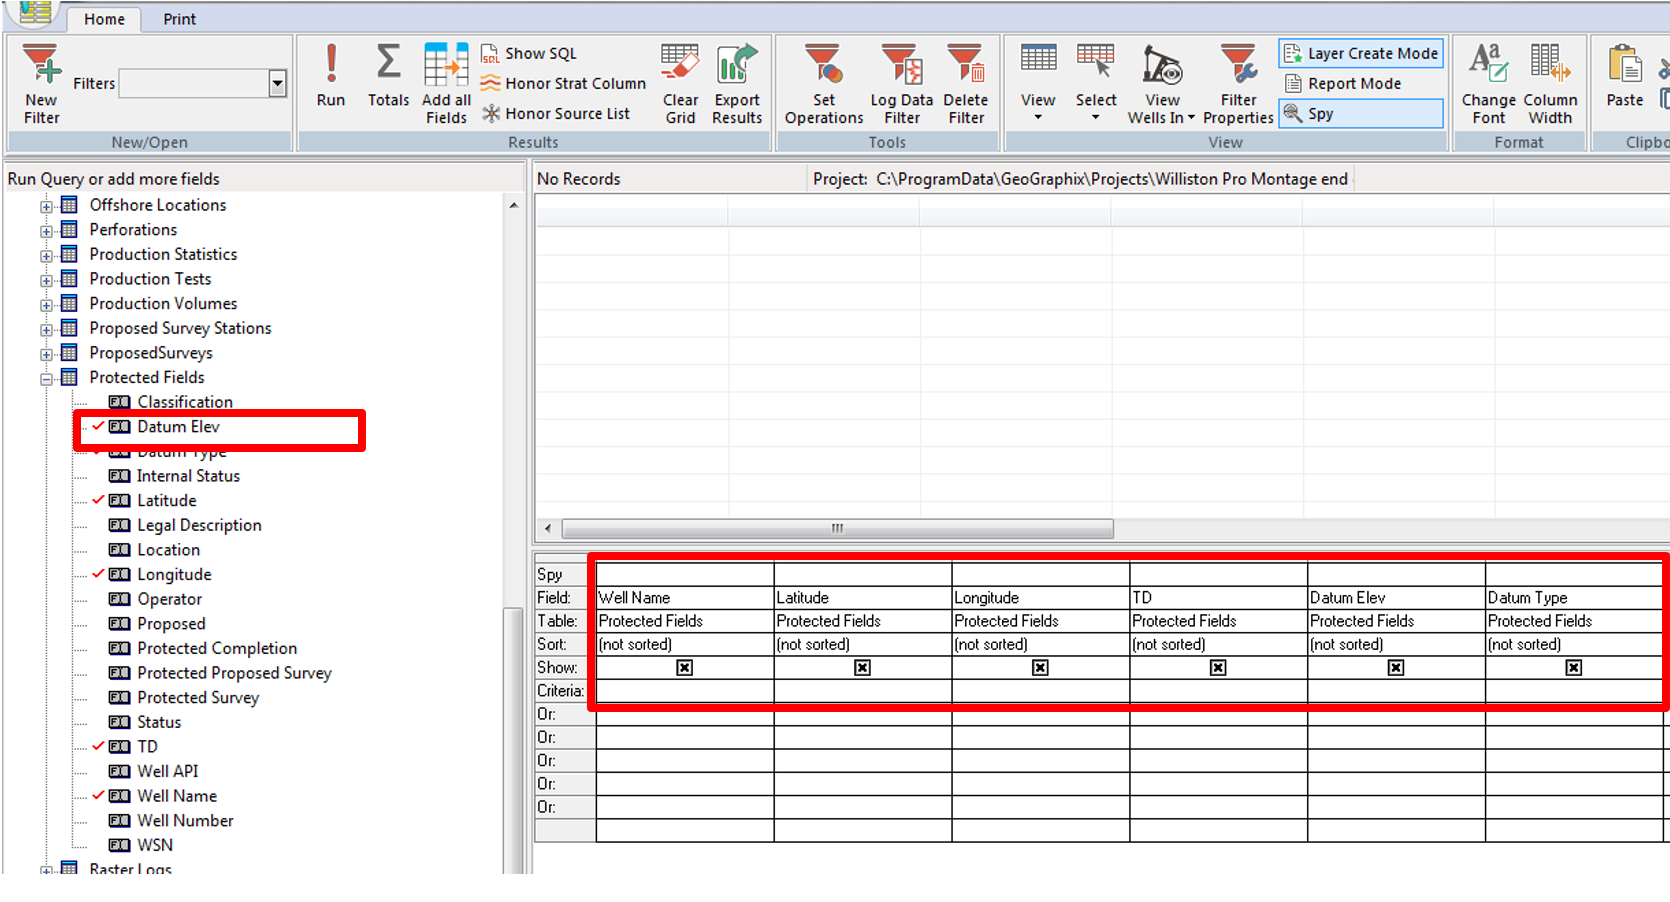
- Click the Run button at the top of the toolbar to execute the query.

- The data will appear in the query data list window.

- Click the QueryBuilder icon on the upper left corner and click Save Filter As.
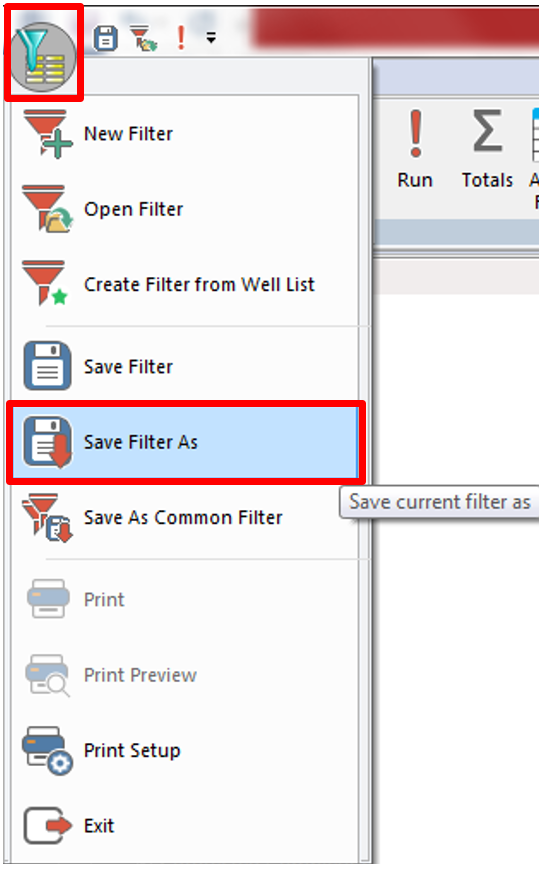
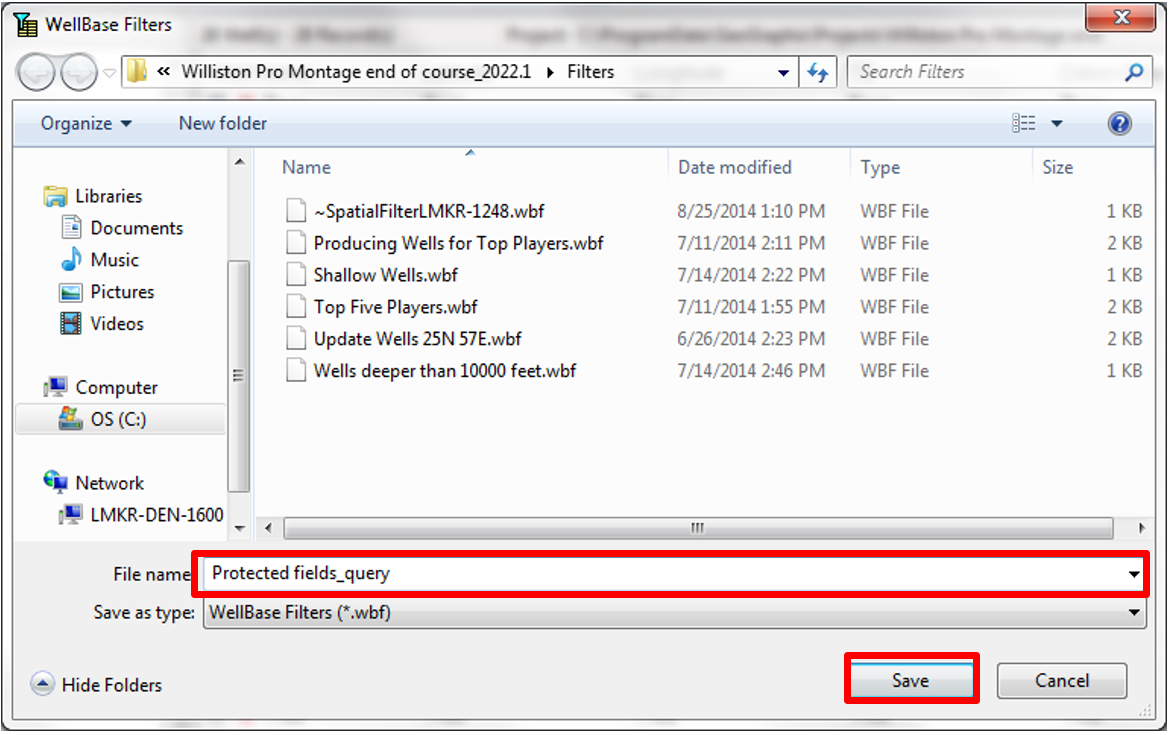
- The WellBase Filters window will open, add a name and click Save.
- To activate the filter in WellBase, go to the Home tab and click Activate Filter.

- The Open Filter window will appear. Select the filter name and click Open.
- The filter will be applied.
- To unprotect the data, right-click and choose Protect/Unprotect Selected Field(s).
