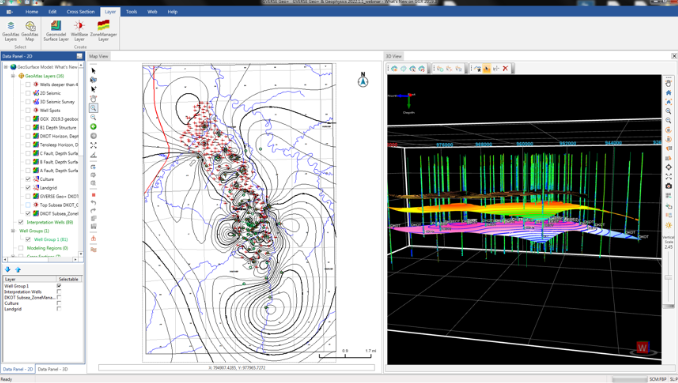
GVERSE Geo+ (previously called GVERSE Geomodeling) is a sophisticated and integrated solution for static reservoir analysis that combines geological, geophysical, petrophysical, GIS, and engineering data in a single environment. GVERSE Geo+ is a very flexible application, giving the interpreter many options and tools from other GVERSE GeoGraphix applications to do different types of analysis and interpretation. One of those tools is the ability to create IsoMap and non-IsoMap layers such as WellBase, ZoneManager, and GeoSurface model layers directly from GVERSE Geo+. This blog will explain step-by-step how to create different types of non-IsoMap layers in GVERSE Geo+.
- Activate a project in GVERSE GeoGraphix and click on the GVERSE Geo+ icon in the toolbar.

- A window showing what’s new in that specific version of GVERSE Geo+ will open. Click CLOSE.

- If the project has a GVERSE Geo+ interpretation (the old GVERSE Geomodeling interpretations will automatically update to GVERSE Geo+), the Open Interpretation window will appear. Select the interpretation and click Open.

- The GVERSE Geo+ interpretation will open.

- In GVERSE Geo+ you can create an IsoMap layer from any interpreted layer with just a few clicks and display that layer in GeoAtlas, GVERSE Geophysics, and GVERSE Geo+.

How to create WellBase Layers, Zone Manager Layers and Geomodel Surface Layers in GVERSE Geo+ - In GVERSE Geo+ go to the Layer tab and click Create to create a Geomodel Surface Layer, WellBase Layer or ZoneManager Layer.

How to create a Geomodel Surface Layer - In GVERSE Geo+ go to the Layer tab and click Geomodel Surface Layer.

- The Create IsoMap Layer window will open. Select the Type: Structural Maps or Attribute Maps.

- In Sub Type select Correlations/Unconformities or Faults (to create a fault map) and select the Surface (the surface list is based on the active surfaces on the interpretation).

- In Output add a unique name in Layer Name and click Create IsoMap Layer.

- The IsoMap Build Surface: Create Layer – Display Options window will open. Select the information to be displayed on the layer including Data Points, Grid, Contours and Color fill, apply changes and click Finish to create the layer.

- To display the layer in GVERSE Geo+ go to Layer tab and click GeoAtlas Layers. The Layer Selection window will open where you can look select the layer and click OK.

- The layer will display in the Map View.

How to create a WellBase Layer - In GVERSE Geo+ go to the Layer tab and click on WellBase Layer.

- The Choose WellBase Template window will open where you can select from New WellBase Template (to create a customized layer), Well Spots (a pre-built layer to spot wells), and Wells with TD and hidden well name (a pre-built layer to display wells with TD and extra information). For this workflow, select New WellBase and click OK.

- The WellBase Layer Create – New Layer/Template window will open. Select all the parameters to be displayed on the layer and drag them from the list to the white dot (well).

- If the Top Subsea information was dragged to the WellBase layer the Additional Information Needed – All Formations window will open. Select the formation name, the sources, extra information, and click OK.

- The Formation subsea data will appear in the well. Select any extra information from any other list if necessary, add a specific Name describing the information in the layer, and click OK.

- To display the layer in GVERSE Geo+ go to the Layer tab and click GeoAtlas Layers. The Layer Selection window will open where you can find and select the layer and click OK.

- The WellBase layer will display in GVERSE Geo+.

How to create a ZoneManager Layer - In GVERSE Geo+ go to Layer tab and click on ZoneManager Layer.

- The Create IsoMap Layer from ZoneManager window will appear.

- Select the Zone Name and Attribute Name (the zone and attribute used to create the layer comes from ZoneManager and have to be created there), add a specific Layer Name, and apply a WellBase Filter if needed. Click OK.

- The IsoMap Build Surface: Create Layer – Display Options will open. Select the information to be displayed on the layer such as: Data Points, Grid, Contours and Color fill, apply any changes, and click on Data Sources if you want to add a second layer/parameter.

- The data sources window will open, select the parameters and click OK.

- To display the layer in GVERSE Geo+ go to Layer tab and click GeoAtlas Layers. In the Layer Selection window find and select the layer and click OK.

- The ZoneManager Layer will display in GVERSE Geo+.


