GeoAtlas is the mapping module in GVERSE GeoGraphix, which allows the interpreters to create different types of layers, import different types of data, and work hand-in-hand with ESRI ArcGIS. In addition, GeoAtlas has a close interaction with all the other GVERSE GeoGraphix modules, helping the user create very robust layers. Using GeoAtlas, you can create or generate an interval attribute from an IsoMap layer and display that information in WellBase, GeoAtlas, ZoneManager, and many other applications. This blog will explain step-by-step how to generate an interval attribute from an IsoMap layer.
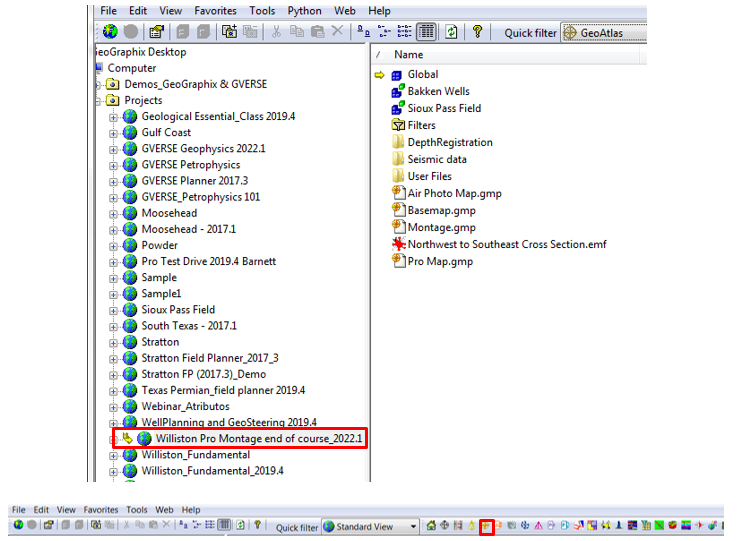
- Activate a project in GVERSE GeoGraphix and click on the GeoAtlas icon in the toolbar.
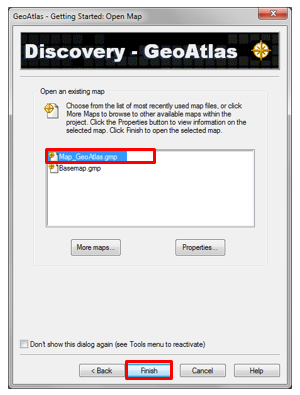
- The GeoAtlas – Getting Started window will open where you can select to create a new map or open an existing map.
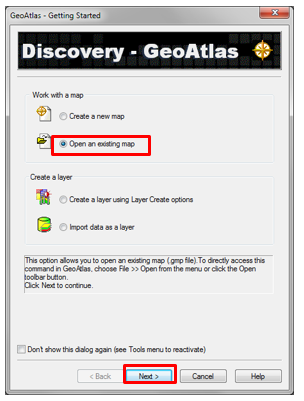
- If you select Open an existing map, click Next, select the map from the map list and click Finish.
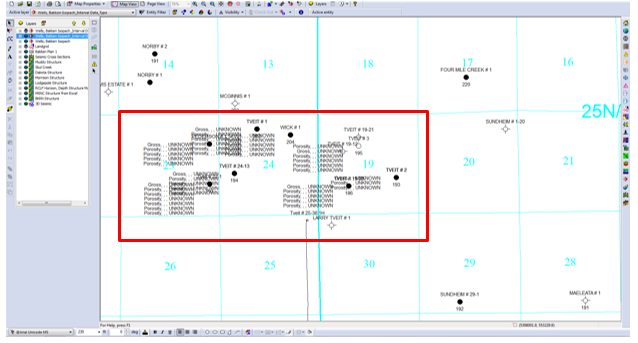
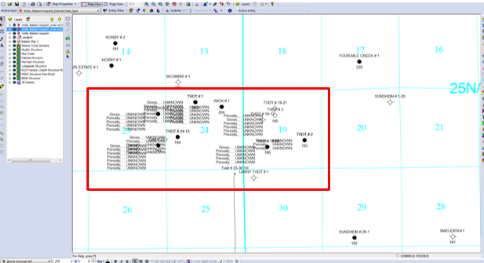
- The map will display in GeoAtlas.
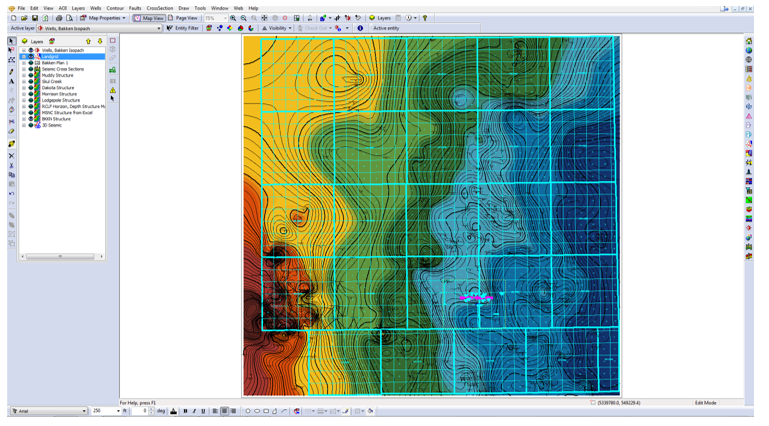
- Turn off any unnecessary layers and in the Layers selection box close the eye of the layer that is to be turned off. Turn off as many layers as required.

To create a layer with interval data: data fields
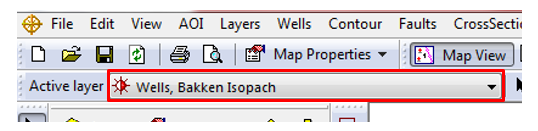
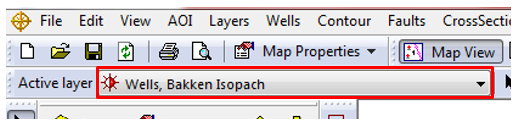
- In Active layer check if a WellBase layer is active. If not, click the drop menu and select a WellBase layer.
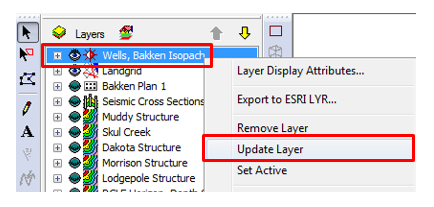
- On the map or on top of the active WellBase layer name in the layer select box, right click and elect Update Layer. The WellBase layer update window will open.

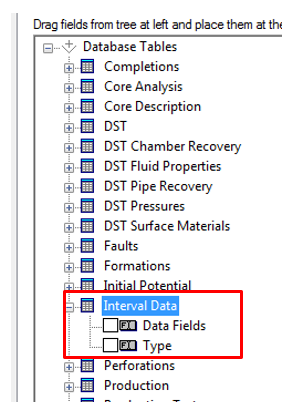
- Under Database Tables expand the tree under Interval Data and two options will appear: Data Fields & Type.
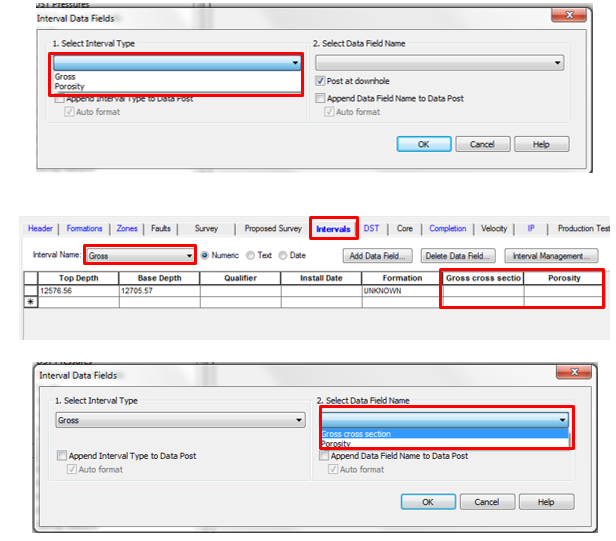
- Select Data Fields and drag it to the right next to the white dot. The Interval Data Fields window will open.

- In Select Interval Type click the drop menu and select the interval data to be used. The interval data in this example comes from a cross section interval data. In Select Data Field Name select the data from the drop list. The data field information comes from Intervals tab in WellBase. Click OK.
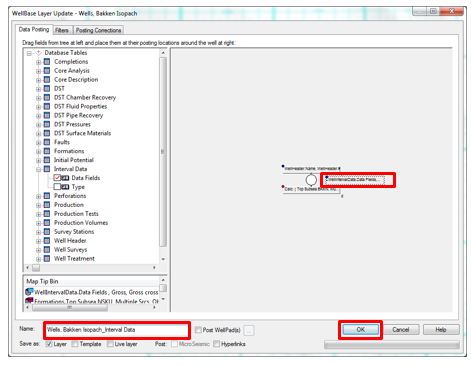
- The interval data will appear on the layer display area (next to well location – white dot). In the Name box add a new name if necessary and click OK.
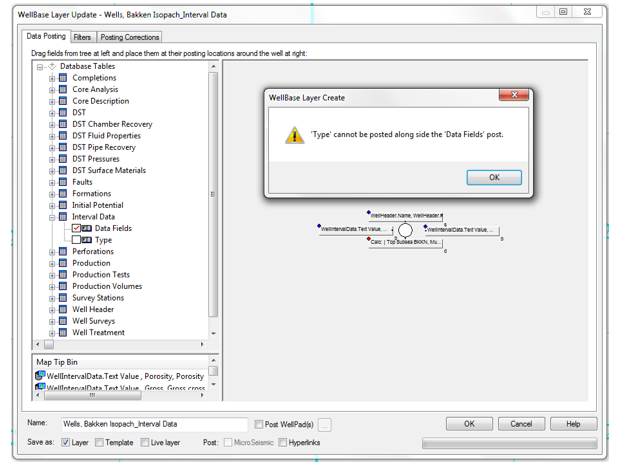
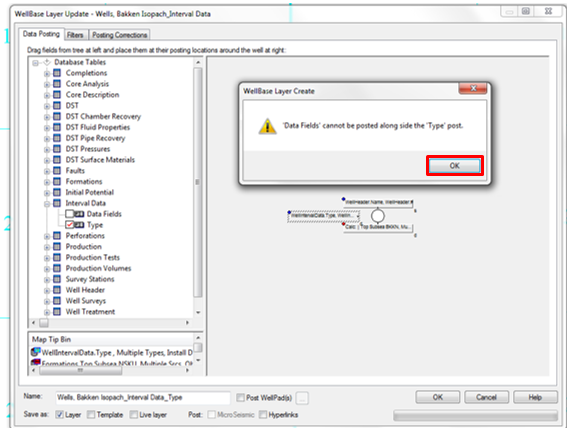
- If you try to add Interval Data – Type on the same layer, a WellBase Layer Create warning message will appear: ‘Type’ cannot be posted alongside the ‘Data Fields’ post. Click OK to create/update the layer.
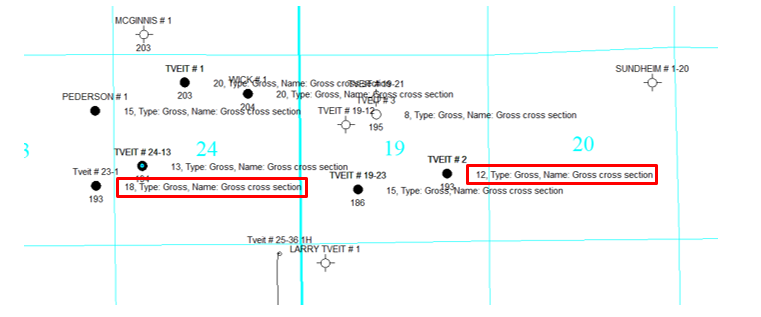
- The interval field information will display in the WellBase layer in the map.
To create a layer with interval data: type - In Active layer check if a WellBase layer is active. If not, click the drop menu and select a WellBase layer.
- On the map or on top of the active WellBase layer name in the layer select box, right click and elect Update Layer. The WellBase layer update window will open.
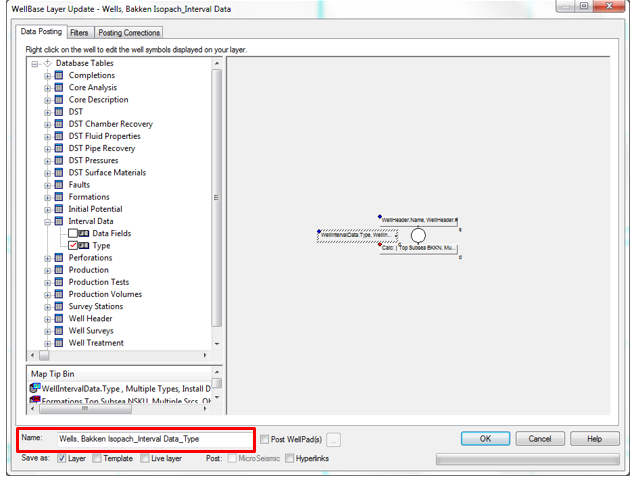
- Under Database Tables expand the tree under Interval Data and two options will appear: Data Fields & Type.
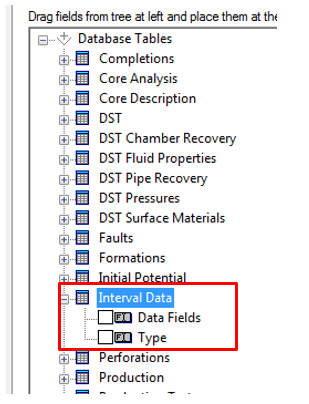
- Select Type and drag it to the right next to the white dot. The Interval Data window will open.
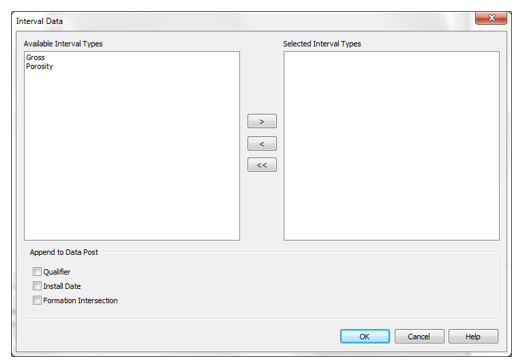
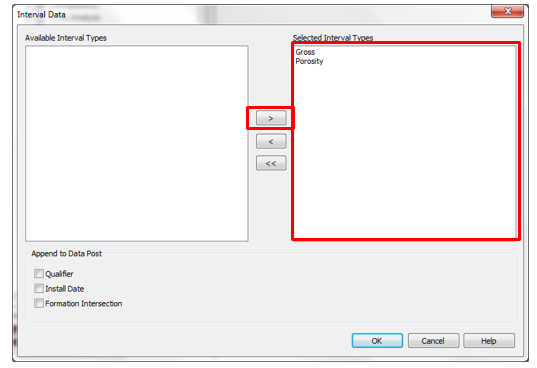
- In the Available Interval Types box select the data to be displayed on the layer by highlighting the interval and click on the single arrow to the right (>) to move the data to the Selected Interval Type box.
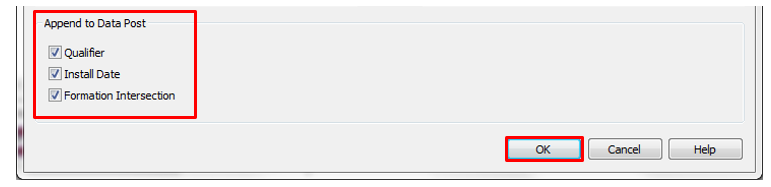
- In Append to Data Post select the information to be displayed and click OK.
- In the Name box add a unique name.
- If you try to add Interval Data – Type on the same layer, a WellBase Layer Create warning message will appear: ‘Type’ cannot be posted alongside the ‘Data Fields’ post. Click OK to create/update the layer.
- The interval field information will be displayed in the WellBase layer in the map.